Oracle Server Restore
Choose from time-based recovery or complete recovery options to restore your Oracle database.
The Oracle server Restore feature allows you to restore your Oracle server databases from your IBackup account.
Features
- Authentication of Oracle server database for restore.
- Provision to restore the Oracle database using Complete and Incomplete recovery methods.
- Provision to report the progress of the restore process.
- Enhanced security as data is transferred and stored using 256-bit AES encryption with a user-defined key that is not stored anywhere on the IBackup servers.
- Provision to generate the log files for each restore session.
Requirements for restore
- Install the IBackup application on the computer where the Oracle 9i/10g server/client is available
- The 'IBOracleBackup' folder selected for restore should be in the same path as it was while performing the backup operation
- The database must be in ARCHIVELOG Mode
- The Oracle server user should have SYSDBA privilege
- Oracle Recovery Manager (RMAN) should be available on the computer where the IBackup application has been installed
Consult your Oracle DBA before you perform the Oracle server restore operation.
Enabling ARCHIVELOG Mode
To enable ARCHIVELOG Mode using Oracle Recovery Manager (RMAN), follow the steps given below:
- RMAN> connect target <username>/<PWD>@<SID> [connect to your Oracle database];
- RMAN> shutdown immediate;
- RMAN> startup mount;
- RMAN> sql 'alter database archivelog';
- RMAN> alter database open;
To restore the Oracle server database, follow the steps listed below:
- Login to the IBackup application and click the ‘Restore’ tab.
- Locate and select the ‘IBOracleBackup' folder in your IBackup account.
- Click the 'Restore Now' button, to restore the ‘IBOracleBackup' folder to the local computer.
Note: The 'IBORACLEBackup' folder selected for restore should be in the same path as it was while performing the backup operation. - Once the folder has been successfully restored, click the ‘Server Backup’ tab.
- Under Oracle Server section, click 'Restore'.
- Provide the relevant Oracle Server authentication information when prompted.
- The ‘Oracle Server backup/restore’ screen is displayed.
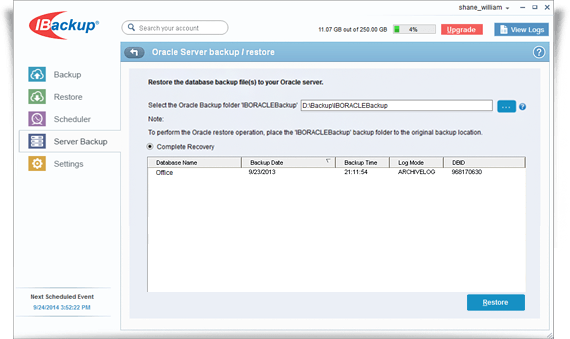
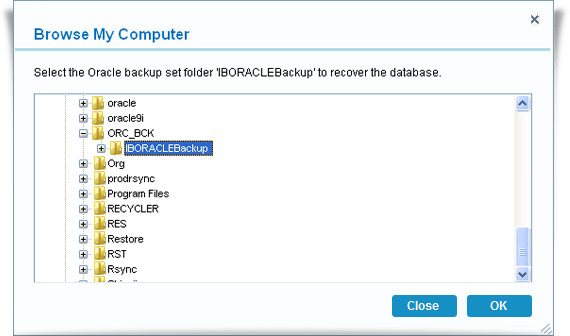
- Browse and select the 'IBOracleBackup' folder from your local computer (the location where the folder was restored earlier from your IBackup account).
- Click the Restore button.
View the steps to backup Oracle server.