IBackup Drive
- What is IBackup Drive?
- How do I upload and download my data using IBackup Drive?
- Can I restore a particular version of a file to my local computer?
- How do I configure IBackup Drive to work with the Proxy Server?
- How do I flush the cache?
- When my mouse pointer hovers over a file in Windows Explorer, the download dialog box appears and IBackup Drive downloads the file. Why?
- I do not want the application to remember my username and password. Are there any settings for the same?
- I can edit an Excel/Word/Access file but receive an error while I try to save the file. Why?
- Can I connect to IBackup Drive from behind a proxy server?
- I get an SSL error message while trying to login to the IBackup Drive application. Why?
- On reboot, IBackup Drive does not connect. Why?
- How do I share file(s)/folder(s) directly from IBackup Drive?
- What is the 'Faster with compression' option during login?
- IBackup Drive crashes on my machine or I receive errors stating 'sslidrive' or 'stunnel'. How do I fix it?
- Is it possible to restore the files / folders that are accidentally deleted from my IBackup account?
- Can I restore the previous version of a file from Trash?
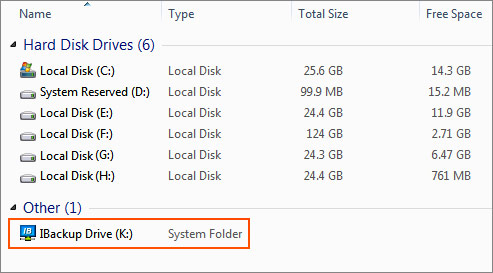
IBackup Drive plug-in is available as a separate download which maps an IBackup account as a virtual folder on your computer. After downloading and installing the application, you can map and drag and drop files to your IBackup account from Windows Explorer. Further, you can directly open and save files stored in your online backup and storage account, from associated applications like Microsoft Office. IBackup Drive supports 256-bit AES encryption for data security.
How do I upload and download my data using IBackup Drive?
To upload your files, select the file(s)/folder(s) on your computer that you want to copy to your IBackup account. Drag and drop the files to IBackup Drive Explorer. Do the reverse to restore your data.
Alternately, right-click the file/folder on your computer, select 'Copy'. Go to the desired folder in your IBackup Drive, right-click the folder to which you wish to copy the data and select 'Paste'. This will copy the file to your IBackup Drive.
Can I restore a previous version of a file to my local computer?
Yes, 10 previous versions of all the files are maintained in your IBackup account. You can select a specific version of a file and restore it to your local computer. The latest version of the file is displayed in your IBackup Drive Explorer.
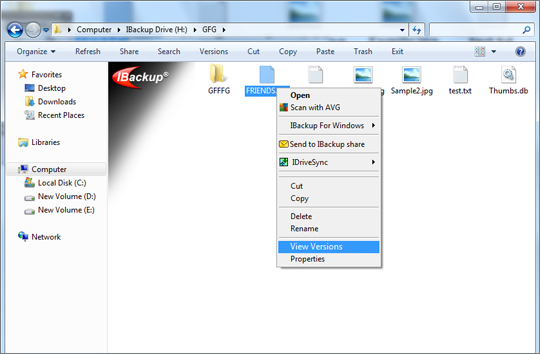
To restore the previous version of a file, follow these steps:
- Right-click the desired file and select 'View Versions'. All previous versions of the selected file are listed.
- Select the required version from the list and click 'Restore'.
- A screen is displayed to choose a drive or folder in your local computer. Select a destination and click 'Restore'.
The selected version of the file is saved to your local computer.
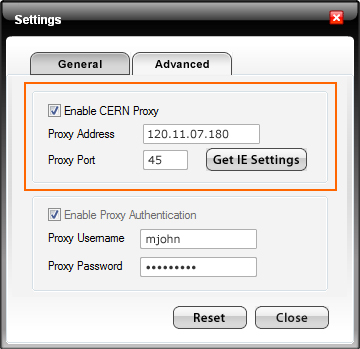
How do I configure IBackup Drive to work with the Proxy Server?
To configure IBackup Drive to work with the Proxy Server, go to 'Start' Menu > 'Programs' > 'IBackup Drive' > 'Settings' > 'Advanced tab'
Alternately, you can also right-click the ‘IBackup Drive Tray’ icon and select the ‘Settings’ option. In the window that appears, click the ‘Advanced’ tab.
Enter your Proxy Server information. If you are unsure about the values, click ‘Get IE Settings’ or IBackup Drive Application. For older versions, contact your Network Administrator.
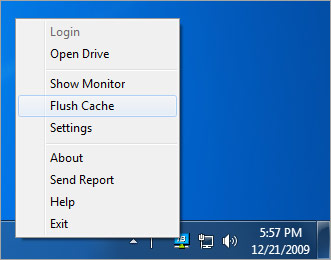
To flush the cache, right-click the 'IBackup Drive Tray' icon. From the menu displayed, click 'Flush Cache' to flush the IBackup Drive cache completely.
When my mouse pointer hovers over a file in Windows Explorer, the download dialog box appears and IBackup Drive downloads the file. Why?
This is actually a feature of Windows Explorer. It extracts the meta information from the file and displays the same in a small pop-up/tool tip window when the mouse hovers over an item. Disable this feature while using IBackup Drive.
To disable this feature, launch Windows Explorer and open the 'Folder Options' dialog under Tools menu. Next, disable the 'Show pop-up description for folder and desktop items' under View tab. Click 'OK' to apply the changes and restart Windows.
I do not want the application to remember my username and password. Are there any settings for the same?
Clear the 'Remember Username and Password' option in the login screen, while connecting to the application.
However, to avoid entering the login information on subsequent logins, select the 'Remember Username and Password' check box. Also, selecting the 'Reconnect Automatically at Login' option ensures that the application is automatically connected after system reboot.
I can edit an Excel/Word/Access file but receive an error while I try to save the file. Why?
It is possible that your file has a long name and/or some special characters. Shorten the file name, remove the special characters and repeat the operation.
Can I connect to IBackup Drive from behind a proxy server?
In many enterprise networks, http(s) connections are made via proxy. If you are behind one, check with your administrator on the proxy setups and enter the appropriate information under 'Settings' from IBackup Drive's login screen.
Alternately, you can also right-click the ‘IBackup Drive Tray’ icon and select the ‘Settings’ option to enter the appropriate proxy setup.
I get an SSL error message while trying to login to the IBackup Drive application. Why?
In all likelihood, your system's date is out of range with the SSL certificate date range. Verify and set your system date to the current date.
On reboot, IBackup Drive does not connect. Why?
There is a peculiar situation with respect to firewalls such as Zonealarm, especially if they are not set to start automatically on reboot.
If Zonealarm does not restart automatically on reboot, the necessary permissions provided by firewall to run IBackup Drive may be lost. However, the firewall controls are still in place, even if Zonealarm is not running and does not let IBackup Drive run.
To resolve this, simply start Zonealarm if it is not running and then attempt to start IBackup Drive. Provide the required permissions if you are prompted to do so.
How do I share file(s)/folder(s) directly from IBackup Drive?
IBackup Drive allows you to share files/folders with others for collaborative access, directly from IBackup Drive.
Click here for details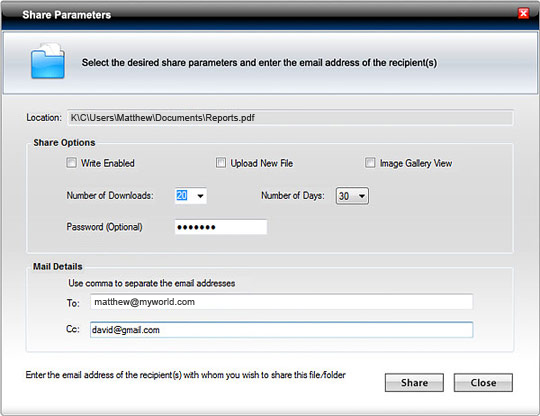
What is the 'Faster with compression' option during login?
The 'Faster with compression' option triples and even quadruples the transmission speed for certain types of files. It is enabled by default.
IBackup Drive crashes on my machine or I receive errors stating 'sslidrive' or 'stunnel'. How do I fix it?
In all likelihood, your computer is not compatible with certain functions relating to compression for faster transfer. Simply clear the 'Faster with Compression' check box during login and try again.
Is it possible to restore the files/folders that are accidentally deleted from my IBackup account?
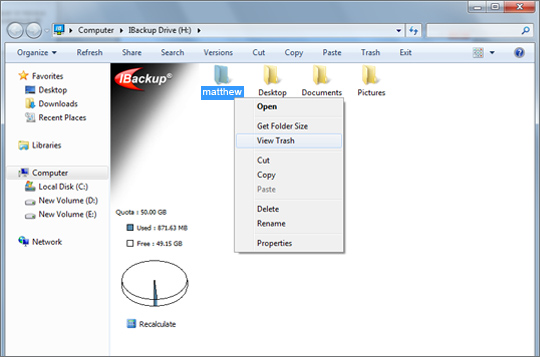
All the files/folders that are deleted from your account will be moved to Trash. You can either move your files/folders to the original location in your IBackup account or restore them to your local computer. The files/folders present in Trash will automatically get deleted after a period of 30 days.
To restore/move your files from Trash, follow these steps:
- Click 'Trash' icon on the toolbar. The files/folders available in Trash are listed with the latest version.
- Select the check box to restore/move the desired files/folders.
- Click the 'Move to Original' button to move the files/folders to the original location in your IBackup account OR click 'Restore' button to restore your files/folders to the desired location in your local computer.
Note: To view the files/folders deleted from a specific folder, right-click it and select ‘View Trash’. You can also delete a file/folder permanently from Trash, if it is no longer required.